With this article, you will learn how to install and configure Jenkins on your Debian-based system.
Before You Begin
Before beginning the Jenkins installation, make sure your system fulfills the prerequisites. Jenkins required Java Runtime Environment (JRE) to run on any operating system. If your Debian system doesn’t have Java installed, Use the following commands to install JRE.
Step 1 – Configure Jenkins PPA
Jenkins team provides official repositories for package management for the popular operating system for installing Jenkins on a Linux VPS. Use the below commands to enable Jenkins PPA on your Debian system. This repository contains the required packages to install Jenkins on Debian Linux.
Debian 11 and above:wget -O- https://pkg.jenkins.io/debian/jenkins.io.key | sudo gpg –dearmor | sudo tee /usr/share/keyrings/jenkins.io.gpg > /dev/null 2>&1 sudo sh -c ’echo deb [signed-by=/usr/share/keyrings/jenkins.io.gpg] http://pkg.jenkins.io/debian-stable binary/ > /etc/apt/sources.list.d/jenkins.list’ Debian 10 and older:wget -q -O - https://pkg.jenkins.io/debian/jenkins.io.key | sudo apt-key add - sudo sh -c ’echo deb http://pkg.jenkins.io/debian-stable binary/ > /etc/apt/sources.list.d/jenkins.list'
Step 2 – Install Jenkins on Debian
You have successfully created an Apt configuration file for Jenkins. You need to update the Apt cache and install the Jenkins packages on your system. Run the following commands to install Jenkins on a Debian-based system. After the installation of the Jenkins server on your Debian system. The Jenkins default Port 8080 is a common port used by various other applications like Tomcat. If your server already has service running on the same port. You can configuring Jenkins to run on other port by configuring HTTP_PORT value in the /etc/default/jenkins configuration file. Restart the Jenkins service after making changes The Jenkins server is up and running now. Now, you need to do some post-installation configuration using the web interface.
Step 3 – Post Installation Setup
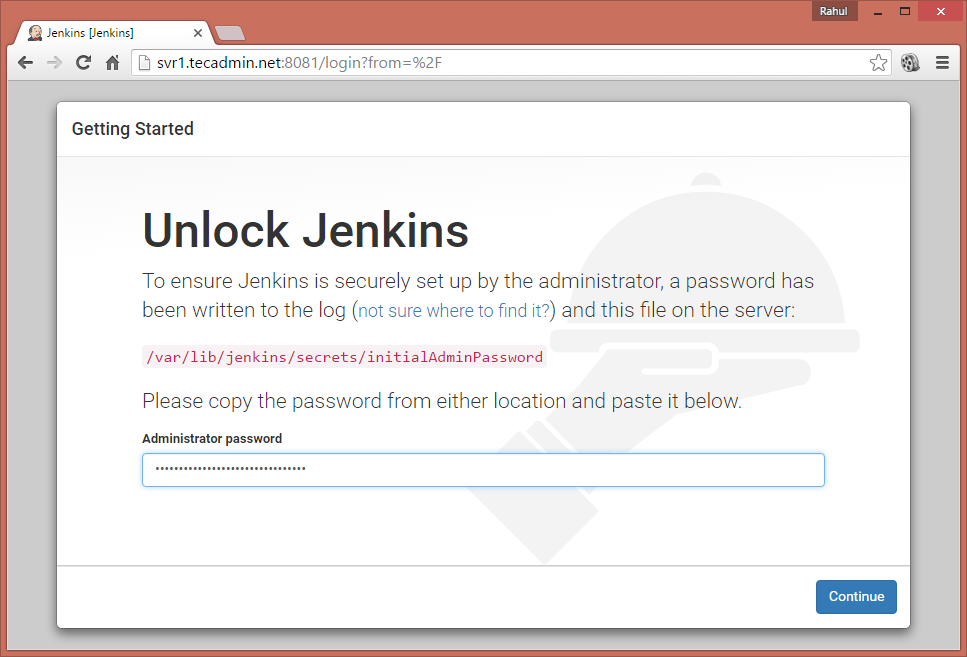
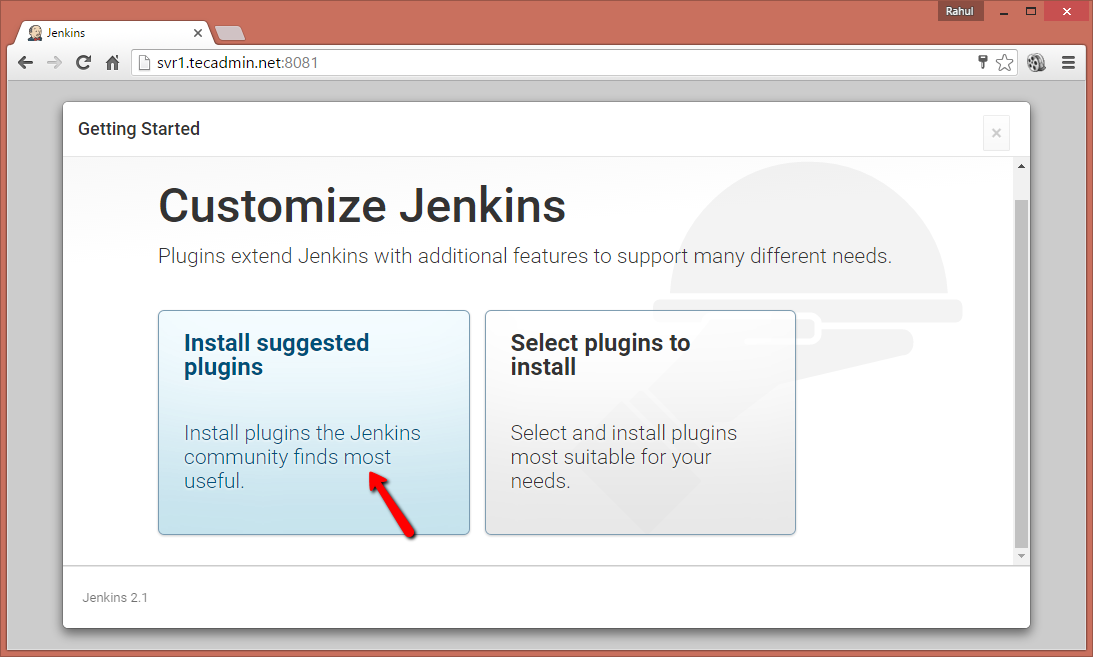
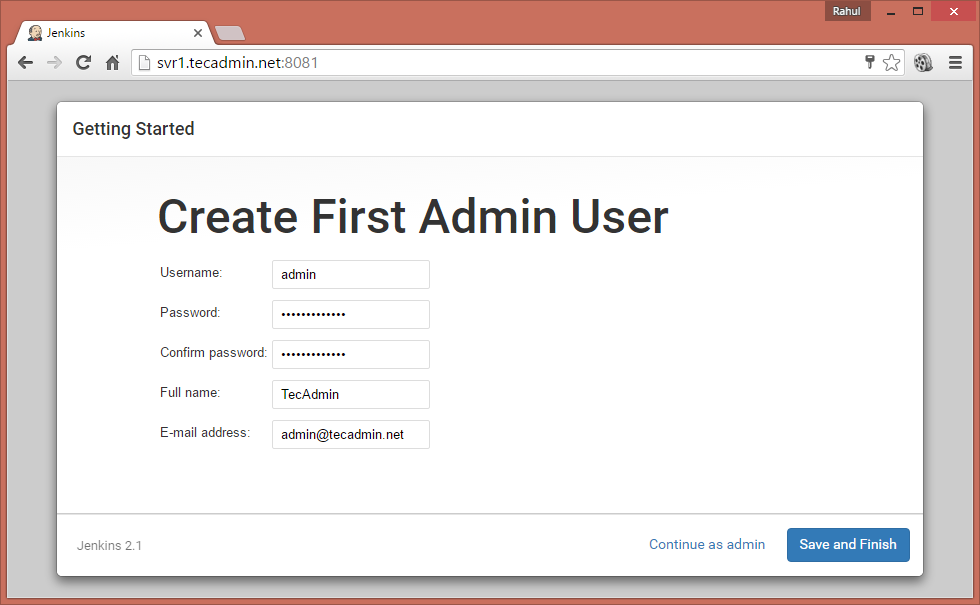
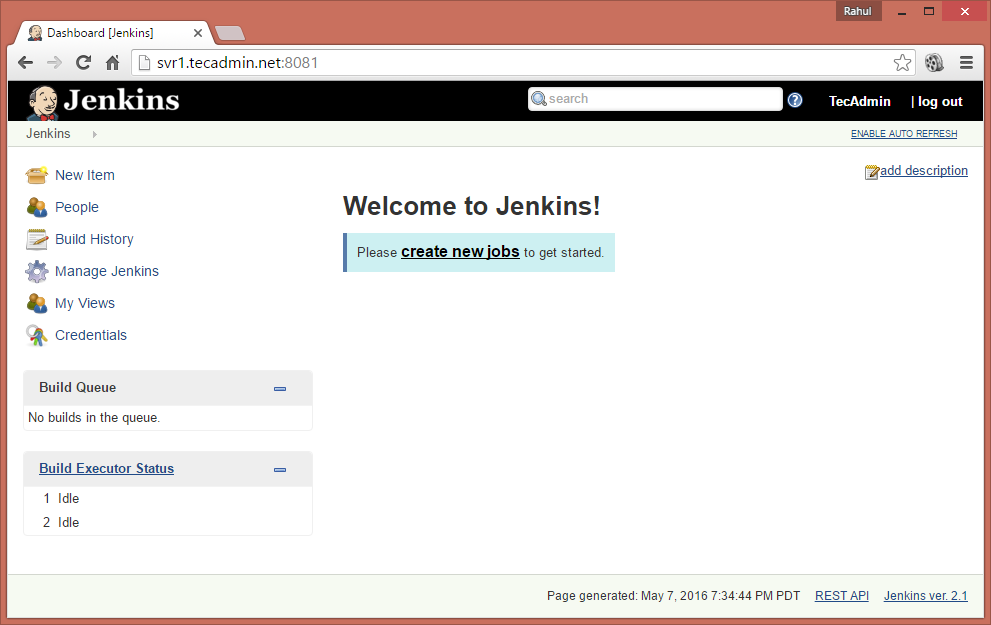
Access your server on port 8080 (Or updated port) in your favorite web browser. This will prompt for the initial admin password that can be found in /var/lib/jenkins/secrets/initialAdminPassword file. The same is shown on the web page: Now select the appropriate option to install the plugin. You can choose to install suggested plugins or select the required plugins options. Now create an admin account for your Jenkins setup. This will be required to log in to Jenkins. After successful completion of the Jenkins setup wizard, You will be redirected to the Jenkins dashboard.
Step 4 – Plugins Installation
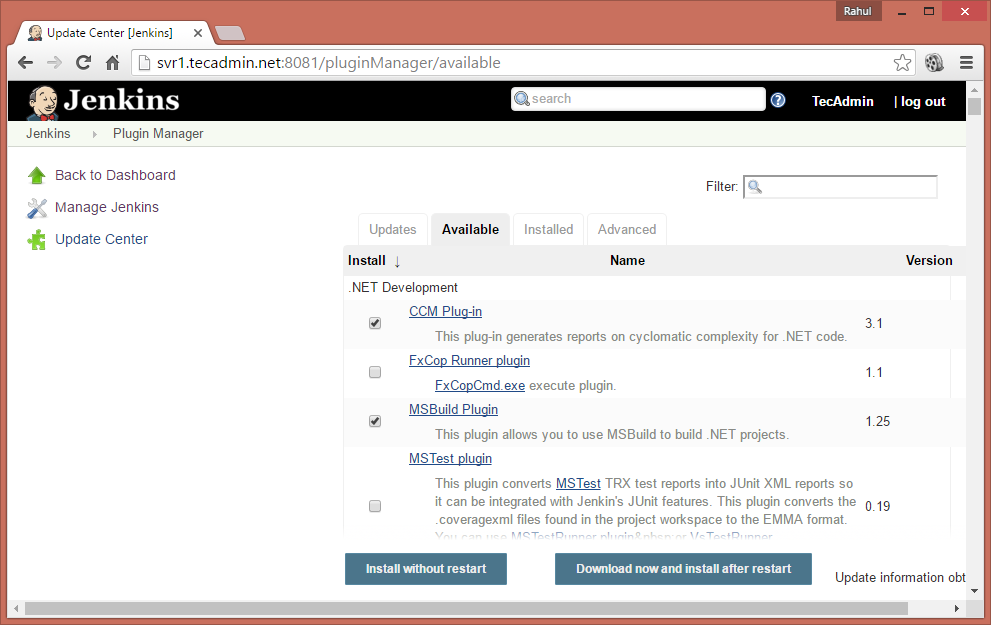
Plugins provide additional features to any application. Jenkins also provides a large number of plugins that provides the extra feature. You can install the additional plugins from the Jenkins dashboard. To install more plugins, login to the Plugins dashboard and then navigate to Manage Jenkins » Manage Plugins. Now select the Available tab. Here you will get a list of available plugins. Which you can select and install to the Jenkins setup. To update existing installed plugins in Jenkins Manage Jenkins » Manage Plugins » Update Tab
Step 5 – Creating Additional Jenkins User
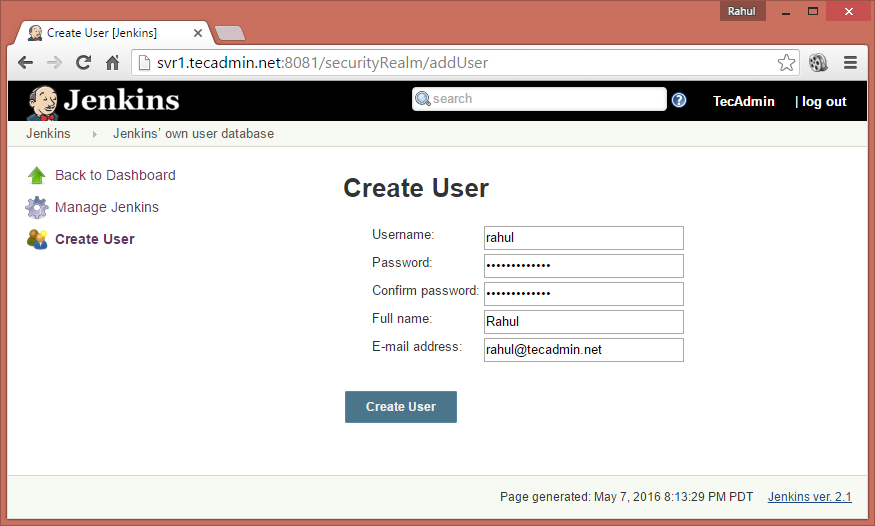
You can set up separate access to all your team members by creating users. To create new users, login to Jenkins admin dashboard and navigate to Manage Jenkins » Manage Users » Create User . Enter the required details and click Create User. Repeat the above steps to create additional users in Jenkins.
Conclusion
Jenkins is a popular as automation server that enables developers to reliably build, test, and deploy their applications. A large number of DevOps prefer to use Jenkins for continuous integration and continuous deployment (CI/CD). You can install Jenkin on any operating system that has Java installed. For the Debian-based systems, Jenkin’s official personal package archive (PPA) is available. That enables us the easy installation of Jenkins on Debian Linux systems.
